gardening

Garden Cleanup and Planning

Wow, what an awesome growing season it was this past year! It was my first year managing a large garden and thanks to the heat, dedicated watering and weeding, I grew much more produce than I could eat so I was able to share the abundance with friends. As I pulled the remaining tomato and winter squash plants in mid-November and planted cover crops of fava beans and clover, I began to think about what next year would bring. 
Fall Cleanup!
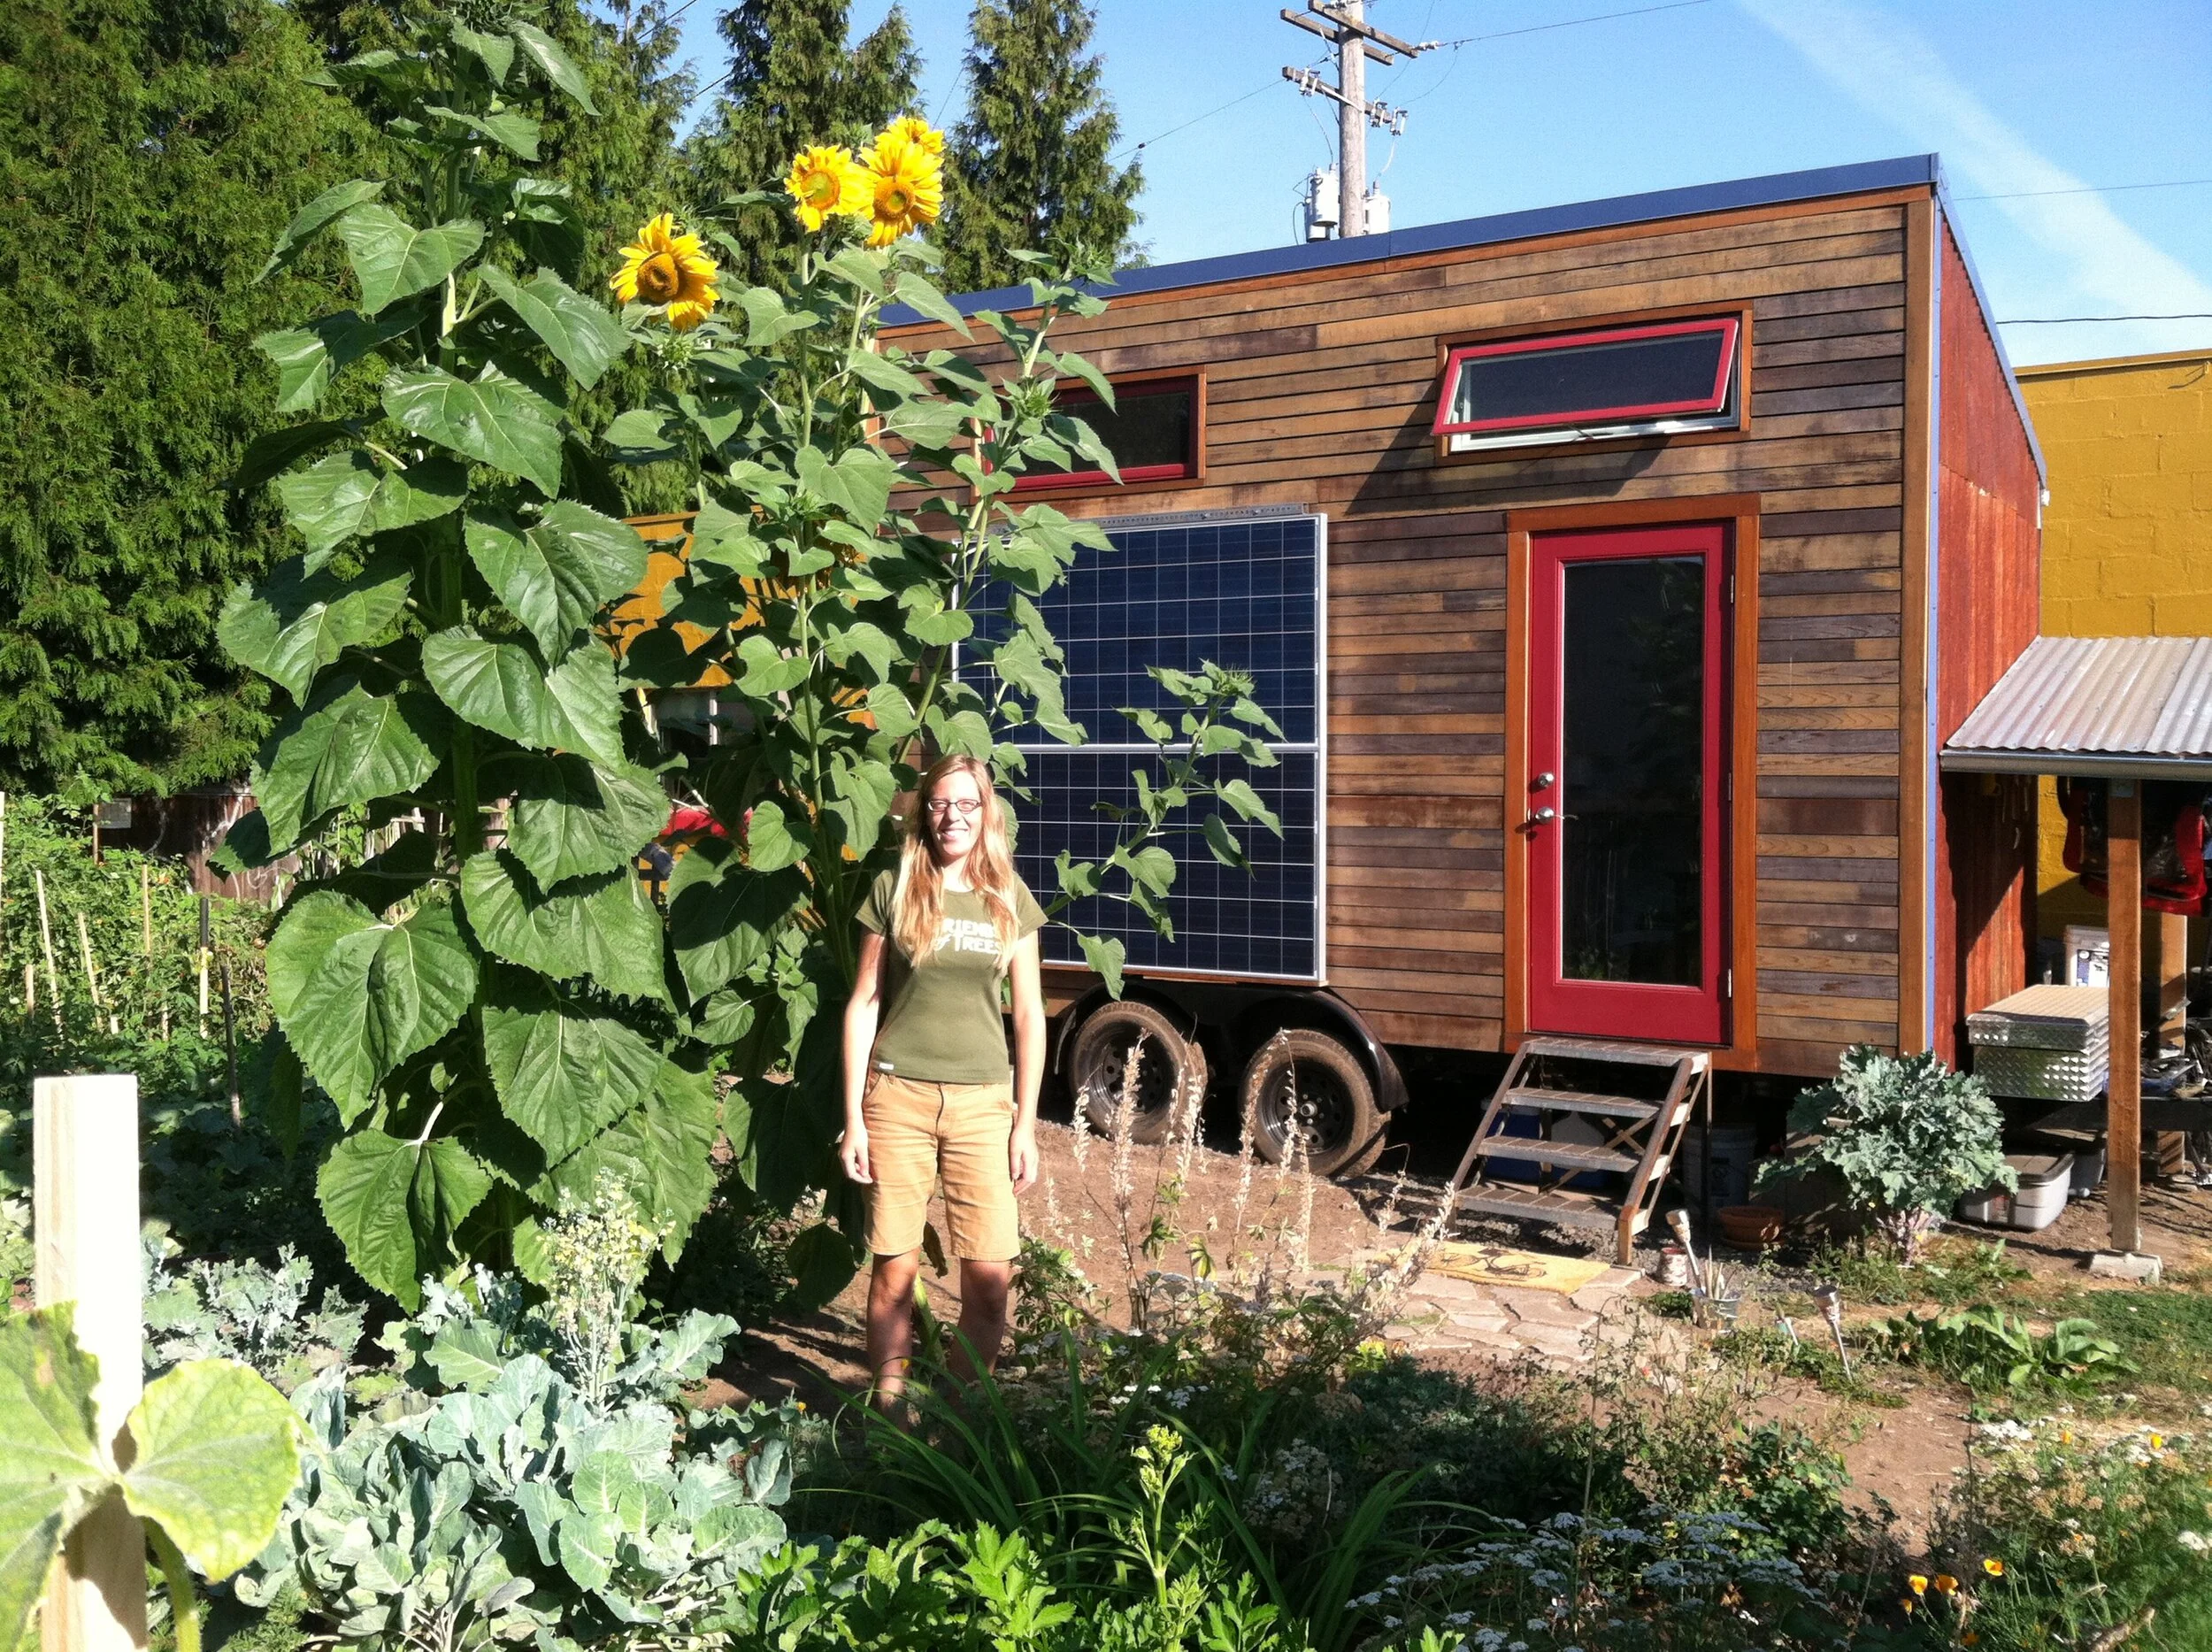
I had already decided that I wouldn't grow as much edible produce without another dedicated helper, but instead add more berry and wildflower plants. I also really enjoyed the presence of the volunteer giant sunflowers so I might plant a whole patch of different varieties and a row of them along the front fence for the neighborhood, privacy and skeletal winter enjoyment.
Early Summer Native Wildflowers and Veggies
I plan to increase the size of the sweet corn patch since even with the dry and hot summer, I don't think there were enough plants to cross-pollinate since the ears were underdeveloped. More winter squash (love the red kuri squash!), less summer squash. More root veggies: beets, carrots, parsnips, turnips and maybe even some potatoes this time. I want to do a better job at succession planting so everything isn't ready at about the same time. I also intend to intermix varieties like my yardie did (now that I can better identify seedlings) to help with natural pest management (namely the aphids) and to achieve a more organic garden aesthetic.
Late Summer :)
Using a map template my yardie created, I mapped out this past year's garden in pen and began planning for next year on another sheet in pencil. I have also been reading a book on gardening my mom gave me. So much to experiment with and learn!
2015 Garden
2016 Garden Planning

A Little Bit of Everything #3

I'm starting a new job installing solar systems next week so I've been making a push to wrap up some house and yard projects before then. In the garden, we've been eating up and pulling out all of the summer veggies and preparing for the winter with cover crops to help build up the soil. I also rebuilt the fire pit because the thistles were taking over since it was usually too hot and dry this summer for fires. Now that the nights are cooling off, I am excited to relax by the fire again!
I found an awesome cantilevered polycarbonate awning with aluminum brackets for above my door so now I'm ready for the rainy season! I'm curious to see how it functions in the rain since the panel has bent up flanges on the top and bottom to help direct rain down and then sideways so you aren't walking through a waterfall to enter. This should help to protect my door hardware as well though I plan to change it out with something of a more square/rectangle design next year. I decided to purchase rather than make the awning since I haven't worked with polycarbonate before and have heard that welding aluminum is challenging, especially for a beginner. I also didn't want to spend much time on that project and was able to find a quality product at a reasonable price. The polycarbonate is also unique in that it's UV layer reflects the sun's rays to keep my house cooler inside. The original design idea was to have a single awning extending from the front of my house but due to various reasons (including the angle limitation above my door since it swings out) it didn't work out that way. I also really like the aesthetic of a colored canvas awning but it wouldn't hold up in the rain here and I would need to develop an anchor system to attach the outside points since there aren't any trees near my house.
I have been working on my "great room" wall design by adding fruit crates which also act as shelves and mirrors which are fun since they add to the perceived space and also offer snapshots of different parts of my house. One thing I just noticed is that I can see into my bathroom from my loft (the bathroom is underneath)! Don't worry, eventually I will have a sliding door there for privacy (and I still need to rework the toilet design and functionality). I'm going to add another shelf above my jackets but am hoping to design some unique bike brackets to hold it in place and/or replace the jacket hooks for a more streamlined design. Part of me wants to find a locker for them and my shoes but I decided to live with a more open aesthetic for a while and redesign as I am inspired.
The other area of my house that has transformed is my kitchen. A friend built me some panels and drawers as well as a countertop the the steel frame I welded together. I decided to go with a red stain for the side panels and most of the drawer fronts so the wood grain shows through. The drawer boxes and slides are black as is the top drawer (as an accent) which is designed to store my induction cooktop when not in use and then pulled out when in use so I don't loose any countertop space. The countertop is black laminate which isn't my favorite but it was inexpensive since I was able to use scraps from the shop next door. We thought about using a walnut butcher block top but it just didn't fit the design. I may swap it out later with some kind of composite material or stainless steel. I also changed up my wall storage with more IKEA products. My plan is to keep a visually open space above the counter for a while now that I have some of the clutter removed from the lower storage area and see how I feel about that over time but I may add some metal upper cabinets to minimize visual clutter.
That's all for now!

Bike and Tool Shed

Happy Spring! Today I spent the morning at my volunteer gig with Friends of Trees, a local non-profit that brings the community together to plant and care for trees. We prepped for tomorrow's planting events of which I will be crew leading at one in a nearby neighborhood. So much fun! Then I walked back to my house and worked more soil to prep it for planting some native plants. I had already prepped and planted a section of the garden for some vegetables and yet another section awaits to be worked over. It's pretty exciting to see the garden transformations over time, especially after all the time spent pulling out weeds...especially the morning glory. For two people living on this site, there is abundant space for gardening which is why I am going to introduce some native plants and ground covers to lessen maintenance and to enhance aesthetics. Native plants are awesome because they adjust to the seasonal variations we experience, growing in wet, dry, cold and hot conditions without much help once established. The area I am creating will be outside my front door across the path so I will get to see it as I come and go.

Other than gardening, I built a small shed for my bike and tools over the tongue of my trailer. I used pier blocks as the foundation since they had worked well on our utility shed. I picked up cedar 4x4 posts and some cedar 2x4s from my favorite building materials place, BMR, along with some really cool old saw blades which I'm going to be using for my reclaimed wall project eventually.
I picked up some nuts, washers and bolts along with a couple of Simpson hardware brackets that I could use to attach the posts to the roof structure with bolts. Awesome find! I wanted to bolt the separate components together so that I could more easily take the structure apart for transport and reassemble. The pier blocks bolt to the posts which bolt to the roof structure. It's probably possible for one person to do themselves but for safety and ease, I enlisted my yardie, Eric, to help me with assembly.
But then I'm getting ahead of myself...Once I had all of the materials on site, I prepped the places for the two pier blocks by measuring off the trailer and house the desired distances and then digging out a shallow hole for each. I filled them in with a few inches of gravel, set the blocks in place, leveled them together and then continued on with the posts.
Since the posts were rough cut, I needed to notch each to receive the 3 1/2" wide post bracket. I've been getting pretty good at cutting with my circular saw so I used it to make the notches. It was a little bit tricky since I had to cut from both sides and then once on the face but it worked out just fine. I cut one post to 6 feet and the other to 8 feet and then 7'6" so it would closer match the slope of my house's roof.
I set each post in place to mark the location of the bolt hole then removed the posts and drilled the holes with a spade bit. I lined up the other Simpson brackets on the top side of the posts, drilled a hole for each and then attached them with the bolt, washer and nut. Next, I set the posts into the pier block brackets and bolted them in place.
To start the roof, I cut two 4' lengths of 2x4s and set them into the top brackets to mark and drill their bolt holes to temporarily position them in place while figuring out the slope. I braced a 2x4 to hold the posts the same distance apart as the pier blocks so they were plumb. The distance was shorter than 8 feet so I rested a 2x4 on top of the other 2x4s to mark the angle cut. Once I made the cuts on the two rafters, I test fitted them and then unbolted the two ends to put the roof structure together. I cut two 2x4s to place at approximately 24" o.c. to support the corrugated tin I had found for free on top.
I screwed the 2x4 frame together, squared it and then attached the corrugated tin with gasketed screws. When that was complete, we lifted it into place and secured the bolts. I added a couple of screws to attach the back 2x4 to my house so it would have a little bit more stability. 
Materials for this project cost $38. I found a used truck tool box on Craigslist for $140 so I U-bolted that to my trailer and packed in my tools. It's really great to have the extra floor space inside my house!