My Trailer, Windows & Rafting

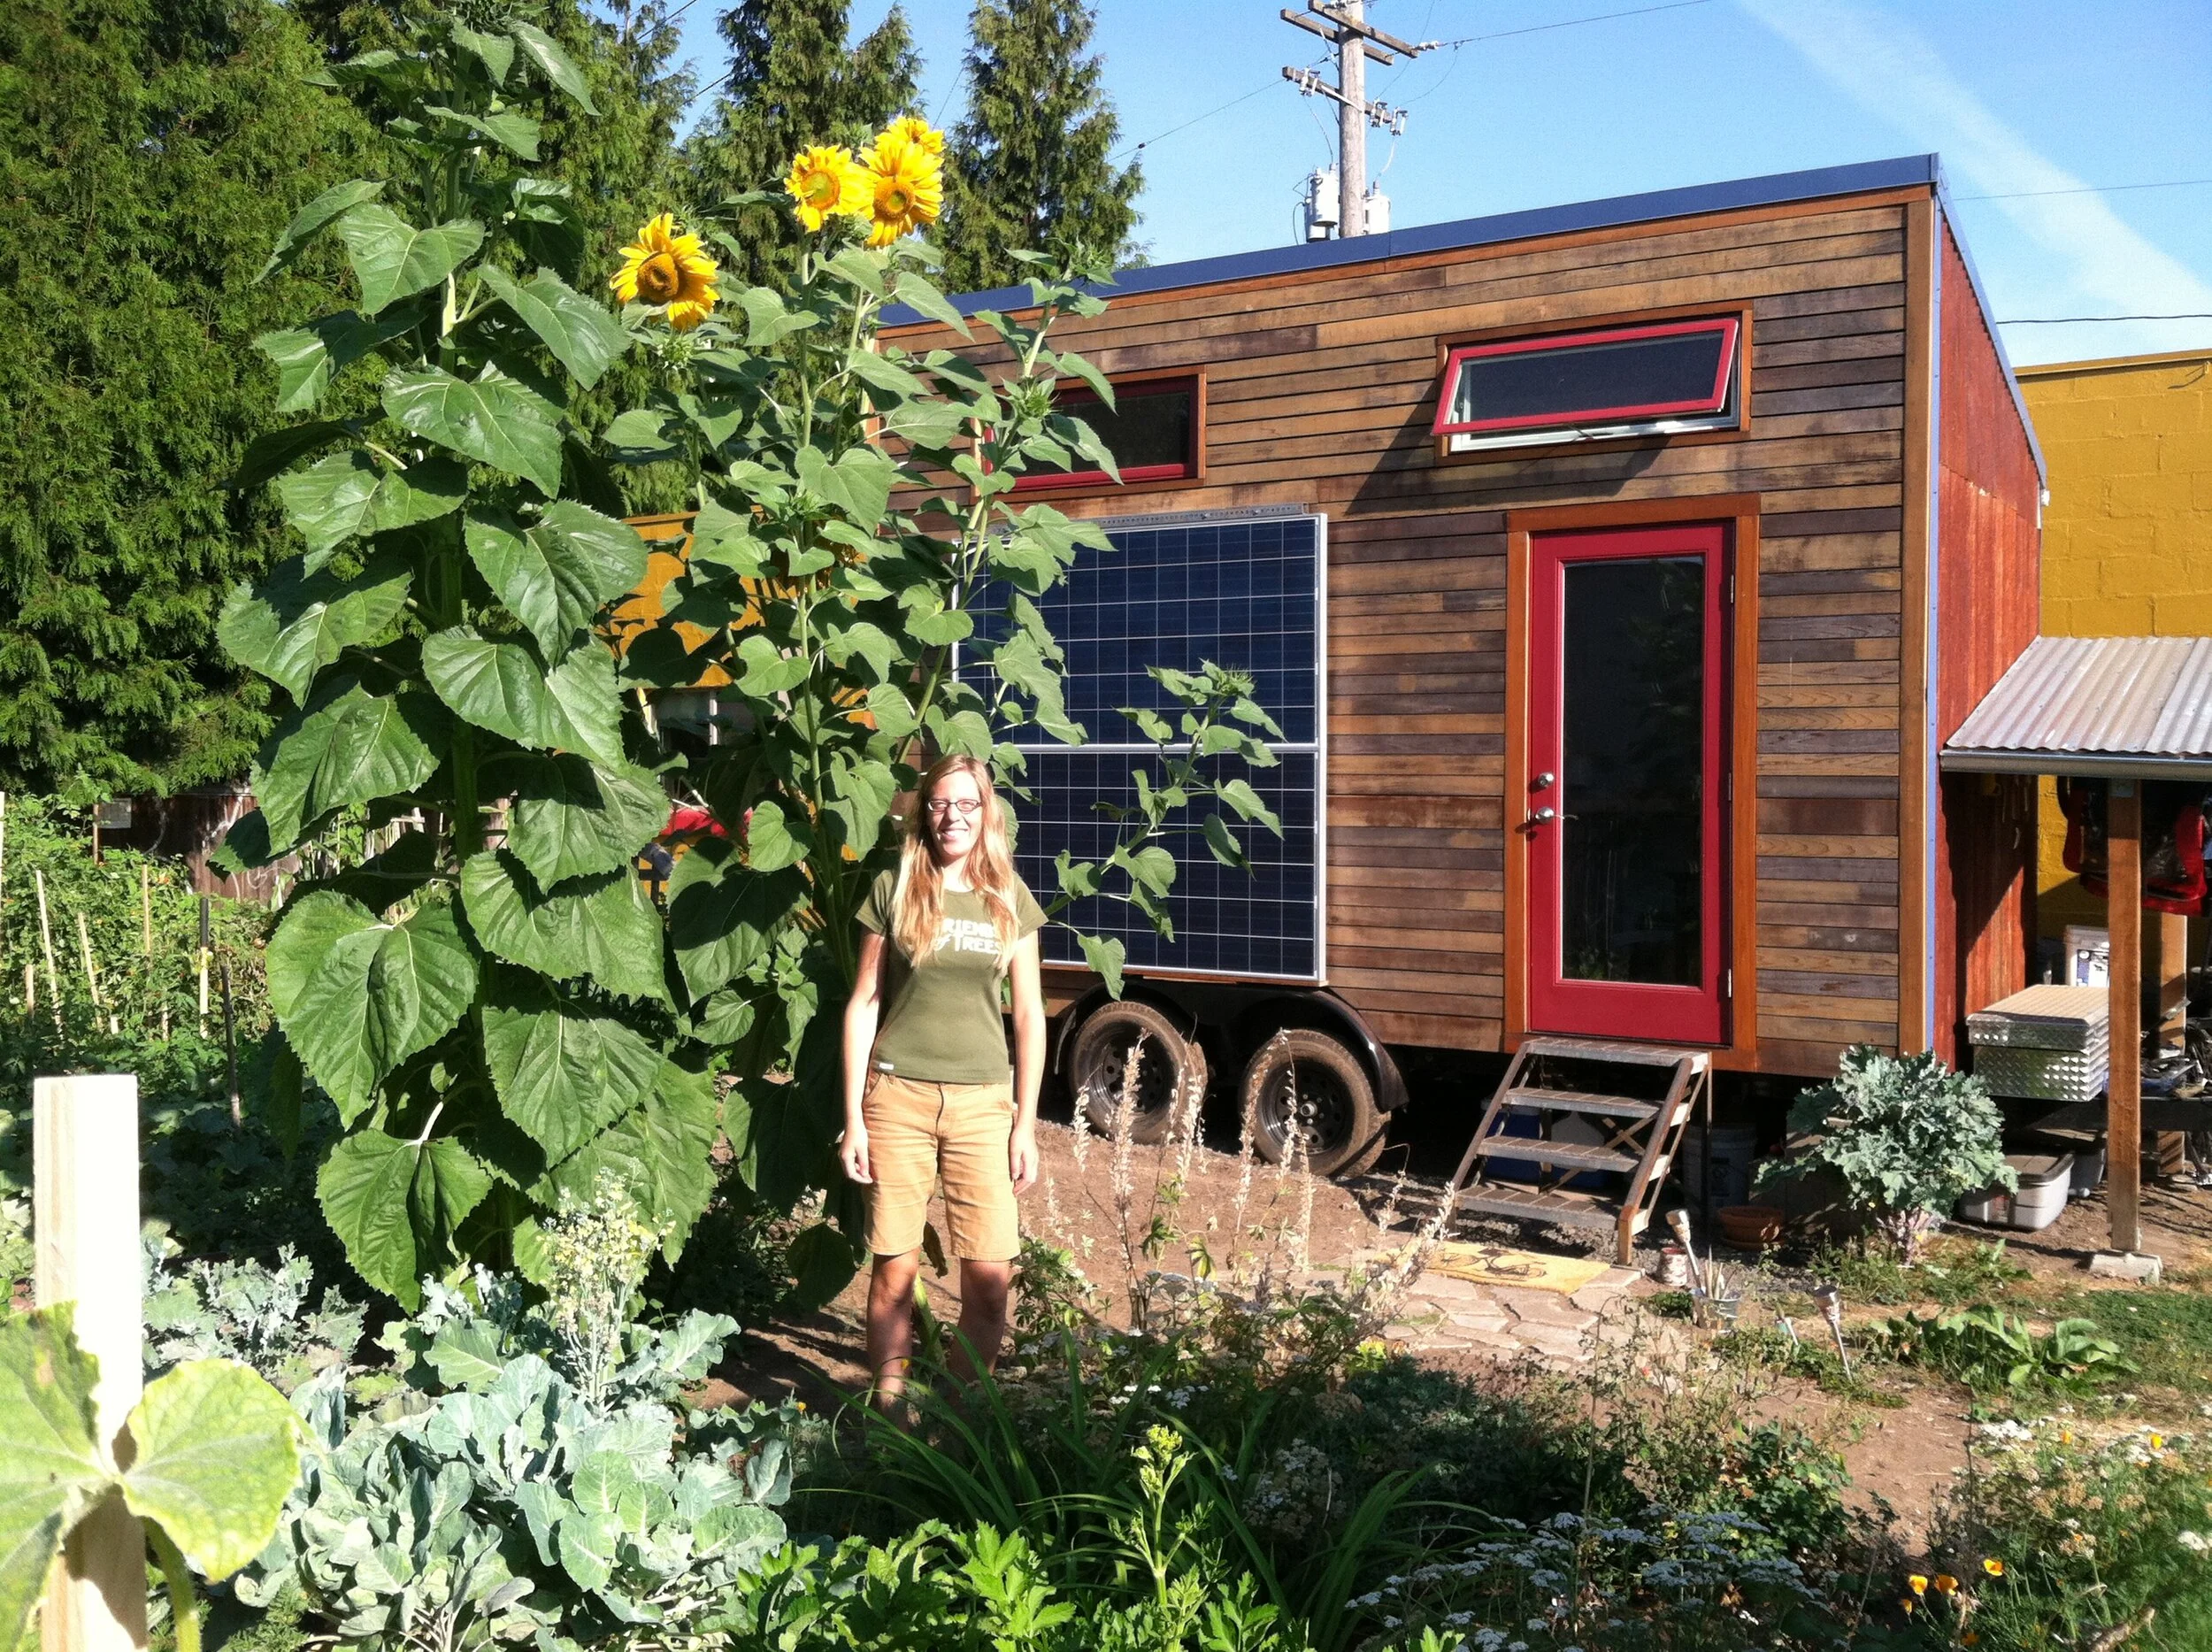
I finally ordered my tiny house trailer from Iron Eagle a couple of weeks ago! You can read my blog post on TinyHomes.com for more details about that process. In short, I decided on a 16' tandem axle, 7,000 lb. GVWR (Gross Vehicle Weight Rating), with 3" angle iron extensions and black wheels. It should be all built in a couple more weeks so look for another blog post here soon!

My windows are the next on my list to order. There are so many options to choose from and I am finding it difficult to choose. Fiberglass, wood, aluminum, vinyl, interior and exterior cladding options, colors, coatings, hardware details, etc. I really like the look of wood windows but they require much more maintenance over time. Some manufacturers have options with wood frames and an exterior fiberglass or aluminum cladding which is attractive to me since I could have both the quality of wood and the durability of an exterior cladding material. One manufacturer offers a fiberglass window with interior wood cladding which I like as well, although with my architecture background, it is less acceptable in principle since it hides the true material underneath. I have more research to do but will likely be going with a Milgard window product since they make some of the highest quality windows on the market and offer a lifetime warranty, even on glass breakage! I need to question a representative more about the warranty as it would pertain to a mobile structure since the windows would be more liable to damage.

Finally, the reason for the delayed post is that I was on whitewater raft guide and river rescue training on the Deschutes for a week and then on the White Salmon for a half day. It was an awesome, intense learning experience and I will be continuing training for 4 more weekends with Orion before I can become a guide. My friend went through the training last year and really enjoys rafting so I thought, why not? Learn something new, be outside, earn some money and have fun in the sun! It looks like this summer will be full of tiny house building and whitewater rafting :)


Tiny House Design Thoughts

I wrapped up my week of house and cat sitting at Sweet Pea yesterday. Spending more time in a tiny house was helpful in getting more of a feel for the space and to notice more details. 

Having access to a kitchen with a sink and cooktop was also a benefit since I am still living with a basic setup at my house. Cooking with gas was a pleasure though a little unnerving that the burner (and flame) was close to the bathroom wall. I had wondered if it would be a good idea to design an arrangement like this, and it is probably fine, but in my house I would want the burners in a more open space. The range hood helped vent the steam and gas fumes but I also opened a window to let more fresh air inside. I do like gas for cooking but I am considering using alcohol as a fuel or possibly even go with electric because I feel like it would be a better option in a small space (and for other reasons which Logan has written about in this detailed blog post). 

I still do not really like L shaped kitchens because the space in the corner is often wasted. In Sweet Pea, placing the water heater below the counter instead of above would have saved counter space and better used the space below in the corner. Since the interior space is wider than some tiny homes, the kitchen beside the bathroom and closet works, though I think it would feel more open if the bath and closet were at the one end and a galley style kitchen over the wheel wells, which is what I am planning for my tiny house. Since I used the chiller box outside for food and had the refrigerator unplugged, it was nice not to hear the fridge hum. It is strange that something like that can be bothersome but I know I am not the only one in thinking so. While I do not plan on designing my home without a fridge, I might experiment with using it less, especially during the colder months when a chiller box works just fine.

I do like the light that the French doors permit inside although I would want doors that are taller than 6 feet and wider than 4 feet. A two foot door is kind of narrow when you are carrying things in and out. Standard French doors usually start at 5 feet wide and 6’-8” tall. While that could possibly work into my design, I think I will likely go with a single 30" or 32” wide glass paneled door. I found a 36” wide door for $75 at the ReBuilding Center today which was tempting but it seemed too wide and had some deep scratch marks on the lower half that would require some serious sanding and refinishing.


Climbing up and down from the loft was no problem for me though I think my shed roof design with a permanent “ladder” will suit me better for getting up there. I liked the option to rotate the bed since the loft is 8 feet deep which I had also planned. Sleeping under the skylight was cool and probably more awesome if in a rural location without light pollution so you could see the stars more clearly. This bed placement works better for one person since you really need to have your body aligned with the skylight or when you get up in the middle of the night, you could hit your head on the sloped ceiling (which I did by myself anyway). I also sleep better with complete darkness and am going to have a blackout shade on my loft clerestory window. I liked that the loft light had two switches, one down and one up so I didn't have to climb up in the dark.

I think I have finalized my design enough (design is never finished) to order a trailer this week so it will hopefully be done by May and I can start building!

Tiny House Sitting


This week I am tiny house sitting at Sweet Pea while Lina Menard is at Yestermorrow teaching Less is More. While I have toured several tiny homes, this is the first opportunity I have had to try living in one. Built on a 16 foot trailer, with an interior width of about 7 1/2 feet, nearly 11 feet to the peak of the ceiling, and an 8 foot sleeping loft, it really feels quite spacious. I have hesitated to seriously consider a gabled roof in my own tiny house design since the loft space feels tight with wasted space at the edges. However, Sweet Pea has taller walls and a shallower roof pitch so the top of the wall is almost 8 feet which is one foot above the floor of the loft. With the extra vertical space, the bed can be placed in two different directions. 


Right now it is aligned with the roof ridge but I plan on rotating it so that the head of the bed is under the skylight to see how I like sleeping there. One thing that still bothers me about gable lofts is the access which is much easier from the center. This usually means that a ladder has to be moved around to grant access but then be out of the way when using the space below. In my shed roof design, I am planning a series of fixed shelf steps against the tall side of the house. I think I will like that design better but I probably will not really know until I build and live in it.

I like that the great room space has french doors since they allow lots of light inside. They are 4 feet wide and 6 feet tall so they could be placed under a loft as well. I am 5'8" so I have been debating whether or not I want to have my entrance into the great room or under the loft. A large part of the design consideration has to do with the layout of the trailer and its wheel wells since I am going to place the door on the long side. I have worked with designs where the door is in front of, behind and on top of the wheel well. I really like the french doors but on a 16' trailer, it just may not be practical for my design. They work in Sweet Pea since they are on the tongue end of the trailer which is where many people put the kitchen, bath and loft. I am unsure of the weight distribution and towing implications of this design with most of the weight on the back end and it is something I am investigating further.

The kitchen has a sink, 2 burner cooktop, toaster oven, microwave and mini fridge. The fridge is currently not plugged in and I have really appreciated the silence since my own mini fridge is in my bedroom. At Sweet Pea, outside is a chiller box which works fine in cooler temperatures for most things that you would normally refrigerate, but now temperatures are rising and it will either be necessary to regularly add ice or cold packs to the chiller or to turn the fridge back on. I really like my two door mini fridge and freezer because then I have the ability to freeze things like half a loaf of bread and ice cream! I have come to the realization that I do not really need to have an oven in my tiny house. I have been using a toaster oven and grill for cooking and have been baking occasionally at a friend's house (where I also do laundry). A cooktop is great to have though so I think I will want to have one, just not sure if I want to go with gas or electric.


The bathroom has a cute mini tub and a simple bucket compost toilet. The cat litter box is also next to the toilet and it smells more than the toilet which does not really smell at all since the waste is covered with coconut coir. When the bucket fills up, it gets emptied into a large barrel outside where it sits for a year and then can be used as compost. I think if I do a compost toilet in my home, I would like to try out a Separett which is an insert that separates pee and poo. Or I will put in a conventional flush toilet with a blackwater tank that gets emptied every month or so.

I plan to write another post about my thoughts on tiny living after I complete my stay at Sweet Pea so stay tuned!

Swapping Switches & Outlets

Disclaimer: I am not an electrician. (Though I have considered it as a potential career.) I have learned wiring from friends and books and the following is my knowledge of how to replace old switches and outlets with new ones. If you need to do electrical work, I highly recommend doing your research or having a professional help you.


Ok, that said, today I swapped out the switches and outlets in the three upstairs bedrooms in the house where I am living. One thing I learned is that it takes a lot of patience to work with wiring, especially when you have to work with a decades old system. Having the right tools helps. I used a voltage tester, drill, screwdriver, needle nose pliers, wire stripper, and utility knife (for cutting off old plaster chunks). I gathered these tools along with the new outlets, switches and plates in a box. Then I switched off the breakers corresponding to the bedroom outlets and switches. Luckily everything is well labeled so I didn't have to do any back and forth testing.

New (left) and old (right) dimmer switches


In the first bedroom, I started with the switch. With the voltage tester, I checked to ensure there was no incoming power. With that confirmed, I unscrewed the cover plate and then the switch plate. I pulled the switch out from the wall box with the attached wires, one hot and one neutral. The ground was connected to the switch box since the existing switch lacked a place to secure it. I unscrewed the black (hot) wire first, then the white (neutral), then I freed the ground wire with the pliers so all wires were ready to be attached to the new switch. 


I learned to connect the ground first so I began with the ground wire which I shaped with the pliers to have a small curved hook at the end. I hooked the end of the wire around the green screw so that the wire curved clockwise. I did it this way so when I tightened the screw, the clockwise direction of the tightening of the screw would match the wrapping of the wire for a more secure attachment. Then I attached the neutral wire to the silver screw and hot wire to the gold screw. (The gold screws were labeled at hot on the back of the switch which was helpful to reaffirm what I thought to be true.) 
Old dimmer switch wiring
New dimmer switch wiring
After all three wires were tightened to the screws, I pushed the switch back into the receptacle, screwed in the screws with the dill (since they are longer screws). Then I used the screwdriver to attach the new metal cover plate. I like to use a screwdriver for this since the screws are usually short and it reduces the chance that I will accidentally scratch the plate with the tip.


Then, I started on the outlets in the room. I used the same process as for the switch except some of the outlets had two hot wires and two neutral wires depending on their original wire run sequencing. The outlets with more wires were a little more complicated, so I made sure to keep track of which wire was attached to where on the old outlet so I would reattach it to the same spot on the new outlet.


I repeated this process in the other two bedrooms. My room has a dimmer switch which was actually no more complicated than the other switches. In four hours, I had rewired 3 switches and 7 outlets! Then I just had to check to see if they all worked. I went back to the basement to switch on the breakers I had switched off and then used the voltage tester along with a lamp, outlet strip, phone charger, etc. to check the outlets. I flipped on all of the light switches and they all turned on, even mine with the dimmer. Success!

A Little Bit of Door Magic

One of the things about 100 year old homes is that most things are no longer plumb, level or square (if they even were to begin with in the first place). After readjusting the front door strike plate shortly after moving in so I wouldn't be frustrated with the latching and locking mechanisms every time I moved in and out, I recently decided to fix the side door as well. The owner and contractors working on the house said it was difficult to open and that special tricks including pliers and pulling up on the door were necessary to unlock and open it. Many people assume that old doors just get that way over time and nothing can be done to fix them. But you interact with door hardware every day so why not find a way to improve the functionality?

Luckily, the work at a previous job gave me plenty of experience with the quirks of old doors, most of which can be fixed. Sometimes there is a limit to the amount of fixing you can do, like tightening wobbly old door knobs, and you need to choose between living with these imperfections or finding another solution, which may be a new door knob or even a whole new door and jamb.

Many door problems can be fixed by "just" adjusting the strike plates of the latch, deadbolt or both. I say "just" because the solution to every door problem varies in difficulty with some requiring more skill and patience than others. The details and variations of which would lengthen this post greatly so I will just write about the door in my house specifically.


I began by gathering up the tools I would likely need: drill, drill and drive bits, hammer, chisel, tape and pencil. Next, I tried opening and closing and locking the door to gain an understanding of the door in its existing condition. I checked the hinge screws to ensure they were tight. I looked at the strike plates to see if there were any marks where the latch and deadbolt were hitting when the door would close. Sure enough, the marks were visible on both strike plates. I was lucky in this situation since part of the plates had been painted so the marks were obvious. That is not always the case.


The marks were at the lower edges of the openings in the strike plates which means that they needed to be re-positioned lower. I used my drill to remove the screws from each plate (you can also use a screwdriver) and then set the screws and plates aside while I began chiseling out wood at the bottom of the holes. I also chiseled out the wood the strike plates rest on at the bottom so they would remain flush with the rest of the door jamb. The trick with chisels is that you want to keep them sharp as it is much easier to do clean chiseling that way.


Then I temporary positioned the strike plates into their new positions with tape to check their locations before screwing them in place. I tested them by closing the door, making sure the latch and deadbolt easily slid into the holes.


When I got them where I wanted, I pre-drilled holes through the two small holes in each strike plate, making sure that my holes were not as deep as my screw length so the tip of the screws would tie into the wood without spinning. I was again lucky that I had existing wood in the door jamb to drill into for the new holes (sometimes you have to patch a new piece of wood in and then drill new screws into that) and that I could use the existing screws (sometimes you have to find new ones since the old ones may be stripped or too short). I kept the tape in place while doing this which is like having an extra hand.


Then I swapped my drill bit with my Phillips drive bit and drove in the screws. I did a final close and lock check and found success. The door is now much easier to open and close and does not require any special techniques or extra frustrations.

If you are in need of a little door magic, you know who to call!

Planter Box Workshop at ADX

Today I taught my second workshop at ADX, this time solo! The topic was designing and building planter boxes, a workshop I had put together as my AmeriCorps individual development project a few years ago. I thought it would be a great class to teach at ADX so I pitched the idea to them, they proposed the idea to their network and found interest. Shortly after listing the workshop on their event page, the 5 open spots filled up in what I am told was record time. People must be getting excited to start spring planting!


We began the morning with introductions, shop safety talk and then a discussion about wood and fastener selection and the pros and cons of different options. I also talked about the importance of distinguishing the difference between nominal and actual lumber dimensions when designing and purchasing wood. Then we moved into the shop and talked about the tools needed to build a planter box and I did a tool demo. 


ADX wanted to have this first planter box workshop taught as an assembly only class so they had working members pre-cut all of the wood to the dimensions of the cut list I provided. I had each pre-cut kit of materials separated out on shop table space so everyone could pick a spot and get to work. Soon the planter box walls and floors were taking shape and then it was time to connect everything with the corner pieces. This took a bit of teamwork and by the end of the class everyone had successfully built a sturdy box to take home!


Next time I will be teaching a longer class where participants will get to cut and rip wood to length and width and then assemble the pieces into a box. They will also be encouraged to bring some of their own tools to learn more about how to use them. The class will be held again at ADX on a Sunday in March so check in with their calendar to sign up when it gets posted because spaces may fill up quickly!


Designing My Tiny House

I have been working on a design for my tiny house since I started reading about them last summer. I assumed I would be building on a trailer and need to follow the size constraints of doing so; 8 1/2 feet wide, 13 1/2 feet tall (from the ground) and 40 feet long. I knew I did not need (and did not want) a house more than half that length, but would it be 20 feet or 18 or 16, or possibly even 14 feet? I have looked at hundreds of photos of tiny houses and have toured several of them. It has made me realize that good design is of greater importance than size. Three of the houses at Caravan Tiny House Hotel were each 16 feet long and the same width yet one felt more cramped and one more spacious than the others. This was due to a combination of layout, materials and components (although many basic componenets were similar in all three). I started off with a 20 foot long model during the Tiny House Design/Build Workshop at Yestermorrow last October because it seemed like a pretty common length and it worked well with my floor plan. During the course, I questioned that length, cut off one of my model's ends and readjusted things to fit  at 18 and 16 feet. 16 feet looked too cramped but 18 feet fit everything I wanted well.
Things I want in my house:
Sleeping Loft - I want to have the opportunity to be at a different level than the rest of my space. I am going to have a daybed below for reading, lounging and for when I don't want to climb up to sleep at night.
Galley Style Kitchen - I feel that corner space is often wasted in kitchens so I am planning to have two 4 foot parallel sections which will include a sink, 2 door mini fridge, enclosed cabinet storage below and open storage above. I also want a full range with oven and cooktop. While I don't bake everyday, I do enjoy baking often enough that I would like a convenient opportunity to do so. I am currently living with just a toaster oven and grill outside which are fine and I have had friends offer their ovens for me to use for which I have been grateful.
Bathroom - I have been going back and forth and in circles about this one. I started out with having a shower and toilet in the same room, and possibly a faucet. Then I separated the shower and toilet into side by side stalls with a sliding door that would cover whichever one was in use. Then I put them back in the same room. Then I decided I didn't need to have a shower because I don't shower every day, didn't want the extra moisture build up in a small space, and could shower at a gym or yoga studio. I have recently put the shower back in (with a bath fan for ventilation) but in the form of a wet bath with the toilet and a 3'x3' footprint. I figure I can try out showering other places and see how that works and if not, then I have mine for backup. For the toilet, I may decide to go compost style but am leaning more toward a flush style with blackwater tank that gets cleaned out once a month. After all, I only flush once or twice a day and don't use all that much water. Plus, in a city and in the mild, wet NW climate, I have my doubts about the success of humanure systems unless they are very carefully monitored.
Water Heater - I have lived in several houses with tankless water heaters and have loved the instant hot water. They are more energy efficient than tank water heaters due to storage losses but also more expensive and I haven't found a manufacturer of ones that will work year round and long term for homes that are sometimes mobile. I have heard that 10 gallon storage tank water heaters will give you 10 minutes of hot water which may be what I decide to go with but I have more research to do.
Space Heating - I haven't decided on anything yet. I'm trying to design my space small and tight enough that I won't have much need for heat. I have been using a portable oil filled radiator in my room to supplement the radiant floor heat system which has been struggling when temps have dropped into the 20s and below. It heats the space very well and the bills weren't that much higher during the last cold snap so that's an option. Or I may get an Envi heater since many others in tiny homes are using and like them. Heating blankets work well too although I've heard they can be fire hazards, again more research is needed.
Storage - I'm planning a closet across from the bathroom for clothes, storage under the daybed for suitcases, tools, bike stuff, outdoor gear, and crafts.
Materials - Reclaimed wood for siding, hardwood floors, cabinets, trim
Wood double pane windows, metal roof, foam insulation

Things I do not want in my house:
Materials - OSB, fiberglass, drywall, Hardiplank siding, shingles, vinyl windows
Appliances - Dishwasher, washer, dryer
Solar - Not this time. I am planning on living in Portland where it is easy to connect to the grid and options exist to buy power from wind farms and solar communities. I plan to have all LED lights which are very energy efficient and will have few other plug loads that the solar would otherwise power. I might look into solar water heating though.

Most recently, I have been debating whether or not to build on a trailer or to build on skids. Designing for a trailer has been somewhat limiting because you have to plan for the wheel wells, weight distribution, front door placement, etc. Without a trailer, I have more freedom with my floor plan. While it will likely cost more to move my house on skids than to rent a truck to haul a trailer, I don't envision moving it often or for long distances. I have some cost comparisons to do there. Without a trailer, I would have to double check the permit situation as from what I know, in Portland, as long as you build under 200 sq.ft. you don't need a permit. I'm not against the permit process as it could be helpful for getting insurance, I just don't want it to be cost prohibitive.

Another thing I have been thinking about is building with SIPS: Structurally Insulated Panels. My biggest hesitation is that I have no experience building with them and I have many questions about their connections, tying into interior components, space for running electrical and plumbing, and future modifications to name a few. They cost more than conventional framing but could be worth it for a tight shell with no or few thermal breaks. The other idea is to frame the house and then wrap the exterior with 2" rigid insulation and leave the studs exposed which would lead to some fun design problems inside. My current design shape is a simple shed roof which would make it ideal for SIPS so we'll see.
I really like homes with two shed roofs offset by clerestory windows which is what I had designed during the Yestermorrow course. However, I decided that 8 feet is really too narrow of a space for both. So my plan is to have my main living space under a shed roof and then build a detachable or temporary lighter shed roof frame with clear roofing above my front door which will shelter the bike parking, entrance porch, bench and hammock lounge area. Maybe even a greenhouse if it is able to be oriented south which is how I have designed it. Together, these structures will have the look of a singular clerestory dwelling.

Tiny Chairs, Houses and a Mixer

Last Saturday I taught my first class at ADX! ADX is a space where designers and builders have access to wood and metal shops, design software programs and classes in related topics. Portland Alternative Dwellings (PAD) hosted a Tiny Chair Workshop co-led by Lina Menard and me. We discussed shop and tool safety, introduced tools and demonstrated how to use them, practiced measuring and cutting on scrap wood, and then dove into the chair. We had an already built chair as an example which was helpful for measurement references and for understanding how all of the pieces in the plans went together. Since we had a small class of four and two instructors, the instructor to student ratio was very low and we were readily able to answer questions. I enjoyed seeing everyone learning how to read plans and use new tools. We stopped for a lunch break and at the end of the day, everyone had successfully crafted a tiny chair! Everyone enjoyed the class and I will be solo teaching the next one on Sunday, February 9th. You can sign up here. I hope to see you!

On Sunday afternoon, Caravan Tiny House Hotel hosted an open house with hundreds of people in attendance. This was due in part to recent publicity and people interested in smaller, space efficient and affordable housing options. The sunny weather also helped draw a crowd. Luckily, I had a previous opportunity to explore three of the tiny houses with a friend in absence of a crowd. However, I had not seen the new Caboose so I joined the others in line eagerly awaiting entry. My favorite part was the loft which was very spacious and light-filled. I spent the remainder of the afternoon talking tiny houses with people and took a quick look around the other three houses as the last of the people trickled out.

This past Thursday, I attended another tiny house mixer at ADX where over 50 people attended and mingled. I gave a short shout out about myself and the next tiny chair workshop in addition to other updates from people in the tiny house world. I'm looking forward to the next one this month!

Patching Register Holes


As a result of the heating system upgrade, the ducts from the old system were removed, leaving holes in the wood floor in the previous supply and return register grille locations. The owner wanted to patch these holes with wood to match the existing floor which was not an easy task given that the original floor is over 100 years old, has been refinished several times and not perfectly level. He originally wanted a 45 degree bevel routered along the edge of the hole opening and then wanted the patch piece to have a matching 45 degree bevel so that it would be supported by the floor without any fasteners, just glue between the bevels. In a perfect situation this may have been possible, but the existing conditions precluded that from working. The existing holes had not been cut straight or square and the floor varied in level even over only three inches!


I used a circular saw, jigsaw and chisel to make the openings closer to square but perfection is beyond my current skillset. Even so, I would have had to make some sort of jig for the router that would have had to somehow been clamped or tack nailed or taped to the floor. I suggested to just use wood pieces with 90 degree edges that would be supported from below by ledger pieces screwed into the subfloor. That was deemed an inelegant solution since the patch pieces would not look great with the imperfections of the hole perimeter. More thought was put into other solutions including solid metal plate patches, new antique looking register grilles, wood register grilles, painting the old register grilles and hiring professional help.


The owner was unsatisfied with all of these options for various reasons. He wanted a solution that would be flush with the existing floor and not allow a collection of dirt to accumulate inside of or around the hole. When he wanted to insulate the floor (which is also the basement ceiling with the radiant system installed underneath), I told him that he needed to decide on a register solution first because it would be much more difficult to work with the floor once the insulation was installed. Under this pressure, he finally decided to go back to the idea of the wood floor pieces with 90 degree edges supported by ledger pieces. The wood he found matches that of the stairs they rebuilt which will darken over time and hopefully be a closer match to the old floor. I also suggested wood putty or caulk to fill the small gap between patch piece and existing floor to prevent dirt from entering that crack.

Heating A Drafty House


The house I live in is over 100 years old. Back then when energy was cheap, homes were built drafty. They had no insulation (not to mention air sealing) and tongue and groove or shiplap siding was installed directly over studs, with tar paper sometimes in between. Windows had only one pane of glass with no special coatings or sealed gases. Homes settle as they age, creating gaps around windows and framing out of plumb and level. Homeowners make alterations to the house to meet their changing needs.


The owners of this home bought it 5 years ago. Since then, they have installed insulation, painted walls, built a new staircase, installed solar electric panels on the roof, and created garden beds in the backyard to name a few things. The current project is a kitchen remodel. Before I moved in, they decided to change out the heating system. Knowing that their house is drafty even with the added insulation (not always great for air sealing in retrofit situations), they wanted something other than the forced air system on the main floor which just moved heat around and out the cracks in the building envelope. They also wanted to remove the expensive electric baseboard heating units in the upstairs bedrooms. 


After considering their options, they opted for a radiant floor heating system which would reduce drafts, keep most of the heat around the occupants and run quiet. The system (also known as hydronic heating) they chose for most of the home consists of a new efficient sealed combustion gas water heater which circulates hot water through plastic tubes that heat metal plates installed under the floor. On the main floor, this is the original tongue and groove wood flooring. Upstairs, it is new bamboo flooring. They installed an electric resistance heat system in the bathroom floor which is covered by tile. I LOVE this system! It's very effective in heating a small space and though electricity costs more, the solar electric system helps offset that cost. It's a wonderful feeling to walk on a warm bathroom floor. The wood floors do not have that same feeling partly because tile retains more heat longer due to thermal mass.


So far, I feel like this is an effective heating system for a house that is somewhat drafty. However, if the water heater has a problem, not only do you not have hot water, you also do not have heat. The water heater was sized for Portland's typical climate. This year, we had an unusual cold snap for about 2 weeks where day temps dipped into the 20's and teens. Since the ground temps also dropped, the incoming water was too cold for the water heater to handle heating as it should. I was still able to shower but resorted to space heaters for a few days after spending days in and out of a house with air temperatures in the upper 40's. Luckily, the weather warmed back up and space heating has not been an issue since. Time will tell how the rest of the winter will go.